Yoga after pregnancy, is the best way to get back into shape. Let’s talk practically. Your tummy would still share resemblances with your six-month pregnant tummy, just hours into delivery. While there is definitely a dip in your body weight immediately after the new life enters this world, you should wait for 40 days to restart your exercise regimen. Scientifically, it takes about six weeks for a woman’s body to restore uterus to its pre-pregnancy state and reinstate menstruation. Once you complete this phase, you could start exercising to shed the excess pounds and remain calm and relaxed.
The best way to achieve this is to practice yoga after pregnancy. While you could definitely practice subtle movements such as ankle and knee rotations during the initial phase, it would be ideal to wait for the period mentioned above to start a complete practice. The poses outlined here are simple, but the benefits are mesmerizing. Wondering what those poses are? Check out right here!
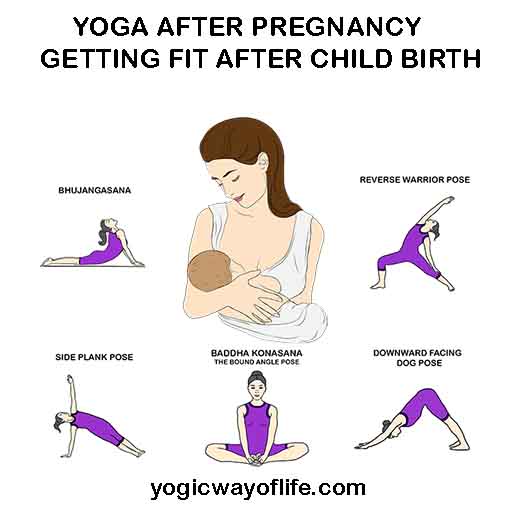
YOGA AFTER PREGNANCY
These yoga poses will get you back to shape quickly. These yoga poses can remove the extra flab. It will tighten your abdominal muscles and gets rid of loose skin. Give them a try and get back to shape with yoga after pregnancy!
-
Marjariasana – Cat Pose – Yoga after Pregnancy
Marjariasana is the first pose in the Yoga after Pregnancy series of poses. Cat-Cow movement relieves the tension from your upper and lower back. It is also beneficial for easing digestive discomforts. Plus, the movement is also known to remove energy blocks and ease stress.
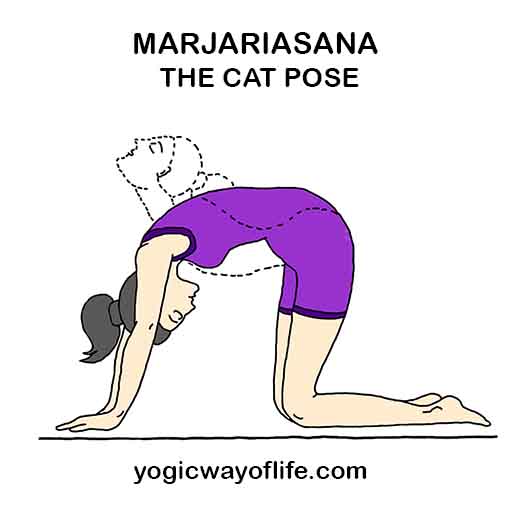
Come on all your fours. Place your palms so that wrists are right under your shoulders. Stack your hips over your knees. Extend your feet, toes pointing away from your body. Spread your fingers wide. Inhale, arch your back, and tilt your head to look up. Expand your abdomen completely.
As you exhale, round your back, pull your abdomen in to bring your navel close to the spine, and tuck your chin to the chest. Gaze down.
Repeat this movement ten times. Synchronize your breath and movement and move in and out slowly.
After you complete 10 rounds, inhale and come back to starting position. Stand up.
Uttanasana is the next pose in the Yoga after Pregnancy series of poses. A mild inversion pose, it is touted to ease anxiety and stress. It also boosts digestive power and circulation while soothing your sore back.
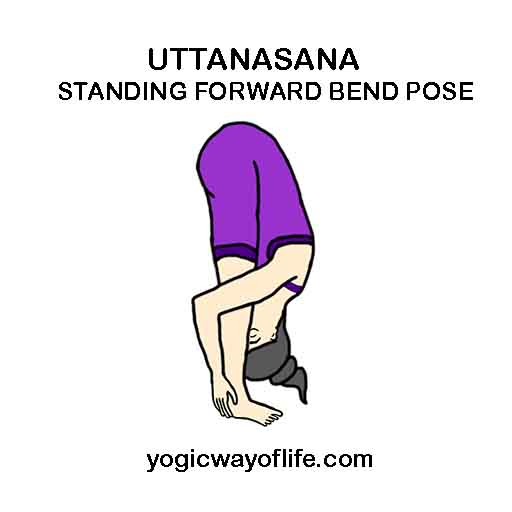
Stand straight, with feet separated hip-width. Align head, neck, and spine. Inhale and lift your hands over the head. Exhale and fold forward from your hips allowing your abdomen to rest on the thighs. Keep a micro bend on your knees. Rest your palms on either side of your feet or wherever they reach. While the ideal state is along your feet, if you are really stiff, you could place it on your shin or grab your ankles.
Inhale, push your hips back, and chest forward. Exhale and fold forward. Once you reach your maximum potential, hold the posture for ten deep breaths.
Virabhadrasana is the next pose in the Yoga after Pregnancy series of poses. This posture works on your thighs, spine, arms, chest, and shoulders. It prevents rounding of the upper back and strengthens and tones your arms and thighs. It is also a great confidence booster.
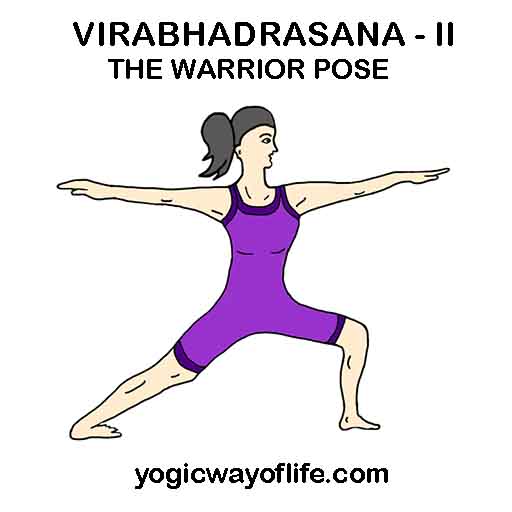
From Uttanasana, place your hands on your hips and slowly roll up to come back to standing. Separate your feet 3 feet apart. Turn your right foot to the right. Inhale and bend your right knee as you tuck your tailbone close to the navel. Turn your left foot slightly inward. Exhale, engage your core and spread out your arms at shoulder level, fingertips pointing away from you.
Inhale and as you exhale, sink your hips down to bring your right thigh parallel to the floor. Keep your hips squared to the sides. Inhale and gaze at your right fingertips. Keep your back leg straight and active, heel pressing into the floor.
Hold for ten deep breaths.
Parsva Virabhadrasana is the next pose in the Yoga after Pregnancy series of poses. Many people call this posture Viparita Virabhadrasana too. The posture stretches your torso and legs alike, gifting you a toned core, legs and arms. It relieves your backache and sciatica.

From Warrior II, inhale and as you exhale, arch your upper body into a gentle backbend. Rest the left palm on left thigh. Extend your right arm to the ceiling, fingers spread wide. Gaze at your right fingertips. Keep the lower body static. Do not make any changes.
Hold the posture, keeping your core and thighs engaged for ten deep breaths.
Parsvakonasana is the next pose in the Yoga after Pregnancy series of poses. This posture stretches the groin, spine, waist, chest, lungs, and shoulders. It also stimulates abdominal organs and increases stamina.
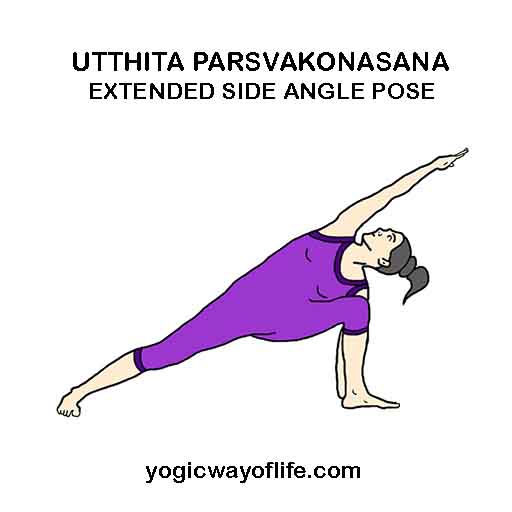
From Reverse Warrior, come back to Warrior II on an inhale. Keeping the lower body same, lean forward and place the right palm inside the right foot. Engage your core and sink your hips lower. As you exhale, lift the left arm to the ceiling, opening your chest to the ceiling. Tuck your tailbone in to minimize the arch in your lower back. Gaze at your left fingertips and hold the posture for ten deep breaths.
Tips: If you are not able to place the palm on the floor, place the right forearm on your right thigh and extend your left arm up.
Gaze at the floor if you have any neck pain.
Parivrtta Parsvakonasana is the next pose in the Yoga after Pregnancy series of poses. It is beneficial for your lower back and digestive organs. It detoxifies your body through its twist. It is also beneficial to open your chest.
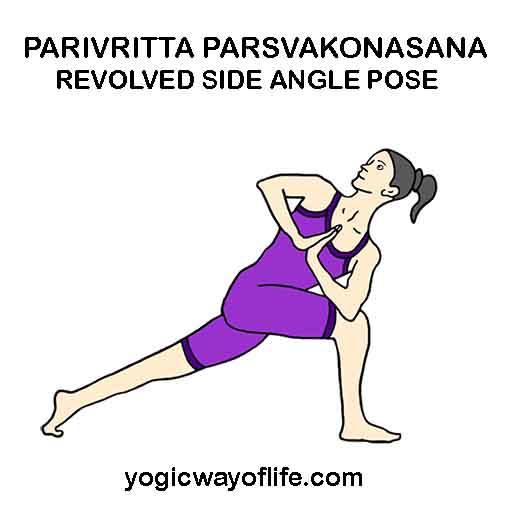
From Parsvakonasana, exhale and place your left palm next to your right palm, as close to the right foot as possible. Keeping your lower body static, inhale and lift your right arm to the ceiling, fingertips pointing to the ceiling. Engage your core and gaze up, moving your right shoulder blade close to the left, opening your chest.
Hold for 10 deep breaths.
Tips: In both the poses mentioned above, there will be a tendency to lean against your thigh. But aim to lift your chest up and move it towards the ceiling. Hence, if you feel you need a block to place your hand, go for it. You could also place the back knee on the mat if you are unstable.
Vasisthasana is the next pose in the Yoga after Pregnancy series of poses. Planks are the most reputed core toners and this posture, the side plank works on your hips too. The pose stretches the shoulders, hamstrings, calves, and arches. It strengthens the arms and legs and is good for optimal digestion.
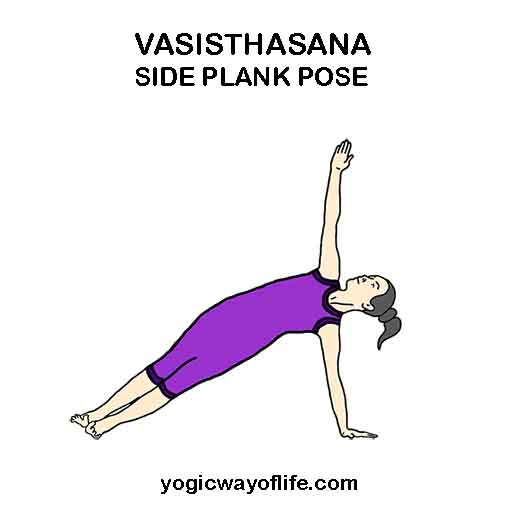
From Parivrtta Parsvakonasana, exhale and place your right palm inside your right foot close to the left palm. Slide your right leg back and stack in beneath your left leg in such a way that the sides of your feet are stacked. Shifting your balance on your right arm, stretch your left arm to the ceiling.
Lift your hips high and engage the core. Pull your navel close to the spine and hold the posture for ten deep breaths.
Tips: Place your top leg slightly in front of you if you are not able to balance.
To deepen the posture, bend your top knee and hold the big toe using the thumb, index, and middle fingers of the respective hand. Inhale and straighten your leg and hold for five deep breaths.
Bhujangasana is the next pose in the Yoga after Pregnancy series of poses. This posture is a boon for the new mothers. It soothes the sore back and calms your down. Just keep your legs active to reap the benefits of the posture.
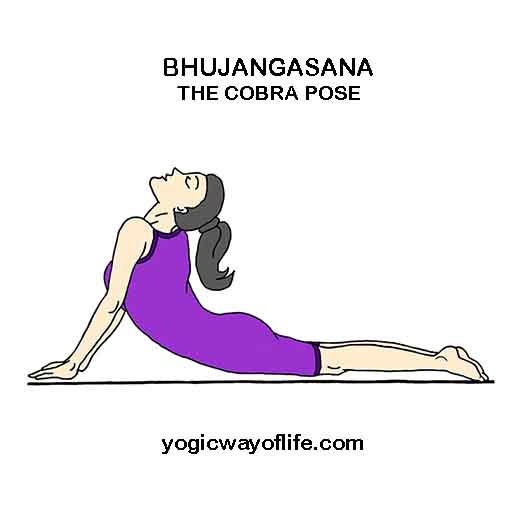
From Side Plank, exhale and place your left palm on the floor. Adjust the alignment of the palms so that they are just beneath your shoulders. Inhale and turn your feet so that toes point forward. Exhale and scoop forward to rest your entire body on the floor. Stretch out your legs, toes pointing away from you. Keep your legs active and squeeze your buttocks. Let the palms remain at chest level and forehead on the floor.
Inhale, press the palms into the floor, and lift your forehead and torso away from the floor. Allow your lower ribs to come off the floor, while lower abdomen rests on the floor. Arch back until you feel a stretch on your lower back. Keep your elbows bent backward.
Gaze forward and hold the posture for ten deep breaths.
Adho Mukha Svanasana is the next pose in the Yoga after Pregnancy series of poses. Put your stress to rest and give your legs and back a good stretching experience with this wonderful yoga pose.
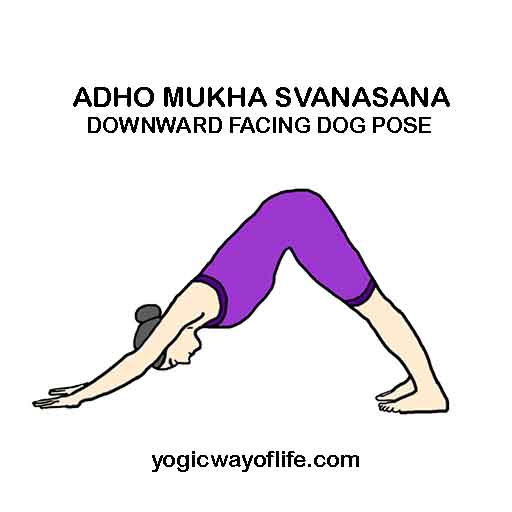
From Bhujangasana, take a deep inhalation and tuck your toes. Exhale, press the palms into the floor, and lift your hips to the ceiling. Engage your core muscles and squeeze your buttock muscles. Press the heels to the floor while tailbone moves to the ceiling. Move your abdomen close to your thighs while head rests in between the arms. Hold the posture for ten deep breaths.
Tips: Keep your knees slightly bent or separate your feet about hip-distance apart if your heels do not rest on the floor.
Baddha Konasana is the next pose in the Yoga after Pregnancy series of poses. A great way to tone your inner thighs, butts, and hips, this is one of the best stress buster. Your back muscles get an additional stretch as you bend forward and rest your forehead in front of your feet. Breathe deeply to massage your abdomen and promote circulation and digestion, ensuring that your metabolism and thereby your fitness levels improve.
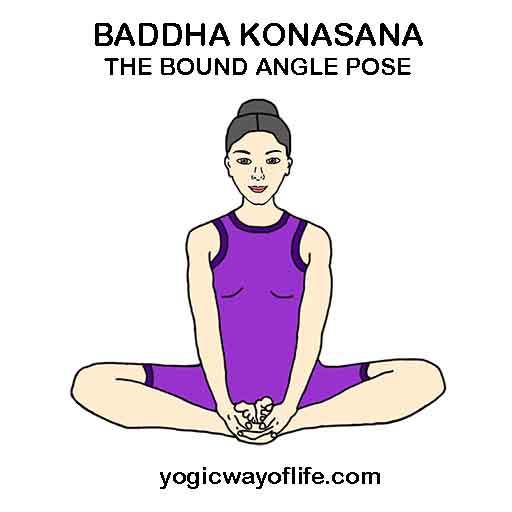
Walk forward from Adho Mukha Svanasana and sit on the yoga mat with a straight spine. Keeping the legs stretched in front of your, rest your palms on your thighs. Bend your knees and join the soles of your feet. Keep the feet slightly away from the body.
Inhale and as you exhale, push the knees towards the floor and bend forward allowing your chin to rest on the toes while forehead rests on the floor in front of the feet. Hold the pose, breathing deeply for ten deep breaths. Inhale and come out of the pose. Stretch the legs and shake them out to relax.
If you have knee injuries, place a cushion beneath the knees for additional support.
This breathing techniques detoxifies your nervous system, cleanses it, and empowers it. Alternate nostril breathing also aids in de-stressing and calming the anxious mind.
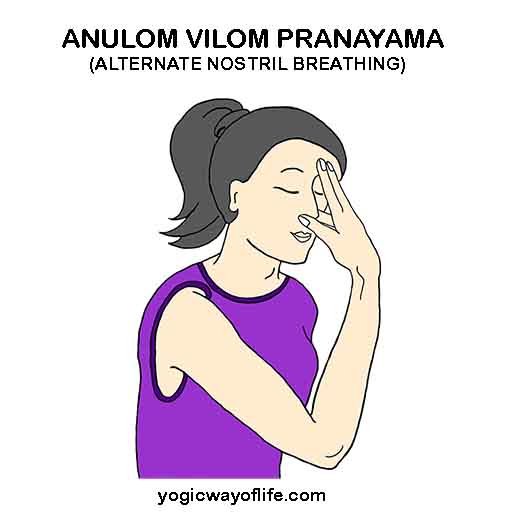
From Bound Angle Pose, sit in a simple cross-legged seated posture. Keep your spine straight. Rest your hands on the thighs, palms shaped into Gyan mudra.
[The right thumb to close the right nostril, ring finger to close left nostril, middle and index fingers folded inward and resting on the palm, little finger erect and towards the sky].
Keeping the right nostril closed, exhale completely through the left nostril once. Inhale through the left nostril, close the left and exhale through the right one. Inhale through the right, close, and exhale through the left. With this you complete one round of Anulom Vilom Pranayama. Do 15 such rounds.
If you have back pain or neck issues, rest you back against a wall.
12. End the Yoga after Pregnancy Session with Shavasana
Shavasana is the last pose in the Yoga after Pregnancy series of poses. Shavasana is the classical restorative yoga pose that gives you the opportunity to sum up the benefits of the entire practice. Along with helping you relax and rejuvenate, it allows you to become aware of your body and breath after the practice.
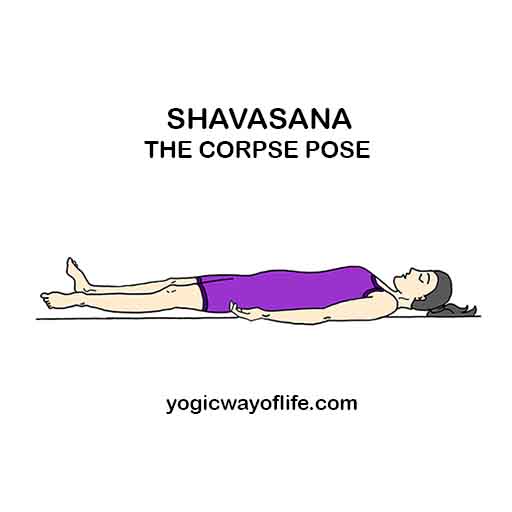
Stretch out your legs after completing Anulom Vilom Pranayama and recline gently on your back. Separate your legs wider than your hips, allowing your feet to fall to the sides naturally. Let the arms rest on either side of the body, palms facing up. Give enough space for your armpits to breathe. Allow the fingers to curl naturally. Close your eyes. Make any adjustments before you allow your body to become still for the next five minutes.
Focus on your breath. Feel the air as it flows in and out through your nostrils, filling your lungs and abdomen. Let your abdomen expand as you inhale and fall close to the spine with each exhalation. Practice 20 rounds of abdominal breathing.
Once you complete the abdominal breathing, breathe naturally. Lie down and relax until you are ready. When you are ready, move your toes and fingers gently. Roll the head sideways. Interlace your fingers over your head. Inhale, hold your breath, and give your body a good stretch. Turn to your right and sit up in any comfortable seated posture.
Join your palms at your heart. Rub your palms to generate warmth and place it on your eyes. Open your eyes and look at your palms. Join the palms again and gently bend forward to express gratitude for your practice.
Remember, it took nine months for this weight gain. And, hence, it will take time to shed the excess pounds also. So, please be patient with yourself and practice yoga after pregnancy to see the differences.
Dear Sir/Madam
Thank you for sending this document.
Regards
Arun Kumar.R