Everybody wants to have a glowing skin. ‘Pranayama for glowing skin’ is a series of breathing exercises to achieve a beautiful, healthy and glowing skin with great texture. It has been proven that Yoga in combination with Pranayama positively impacts the skin.
What is Pranayama?
Prāṇāyāma is an art of conscious breathing, it comprises of two Sanskrit words: Prana which means life force or breath, and Ayama which means techniques of intentionally altering the breath to produce specific results. It is the fourth limb of Ashtanga yoga.
तस्मिन् सति श्वासप्रश्वास्योर्गतिविच्छेदः प्राणायामः (Patanjali Yoga Sutra 2.49)
tasmin sati śvāsa-praśvāsyor-gati-vicchedaḥ prāṇāyāmaḥ (Patanjali Yoga Sutra 2.49)
Meaning: Sitting in your favorable posture and consciously controlling the speed of inhalation and exhalation is Pranayama.
Pranayama is an excellent breathing exercise for overall health. It helps you release any kind of anxiety and strengthens your energy positively. Pranayama is a great way of energizing the body and mind simultaneously. Also, Pranayama removes any energy blocks. People practice pranayama not only to calm their minds and regulate life energy or Prana, but they also practice pranayama for glowing skin. Practicing Pranayama regularly purifies the blood and also it increases the supply of oxygen, all of these together leads to a great skin.
If you’re looking for ways to have a great skin, then here is the list of ‘pranayama for glowing skin’ practices that you can perform and have beautiful and flawless skin:
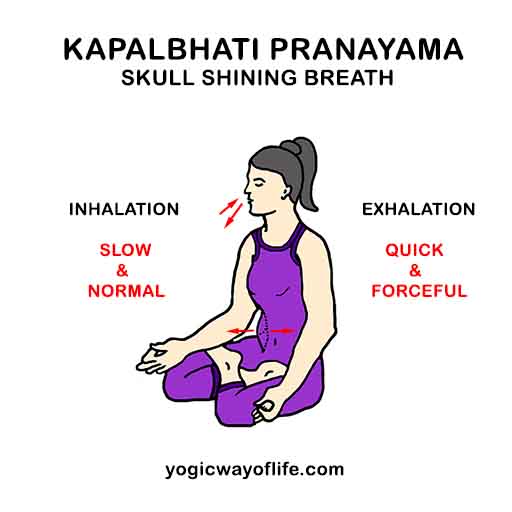
Kapalbhati Pranayama (The Skull Shining Breathing Exercise)
A great way to detoxify the body, as, the technique helps in expelling carbon-di-oxide from the blood. Kapalbhati pranayama is one of the six Shatkarmas or methods of internal purification in Hatha Yoga. Kapal stands for the skull and Bhati for shine or illuminate in Sanskrit. Kapalbhati cleans the cranial sinuses and thus the name. We are listing it as the first method in the Pranayama for glowing skin series
How to do Kapalbhati Pranayama?
- Sit in a steady asana preferably Padmasana, Siddhasana or Vajrasana, with your spine straight.
- Place your hands on the knees and breathe normally.
- Relax your whole body.
- Now, breathe in and out rapidly, with exhalation being forceful. The inhalation should be passive and normal. During exhalation the belly goes inside towards the thorax, forcing out the air from the lungs. Relax during Inhalation to fill the lungs again with fresh air.
- Initially you can start with 11 rounds and gradually you can increase it to 60 rounds in one minute.
- After the practice, relax for 30 seconds to a minute, and breathe normally while relaxing.
NOTE: Practice Kapalbhati on an empty stomach. Early morning is the best time for the practice. You can however, practice in the evening also, make sure there is a gap of at least 4 hours after the last meal.
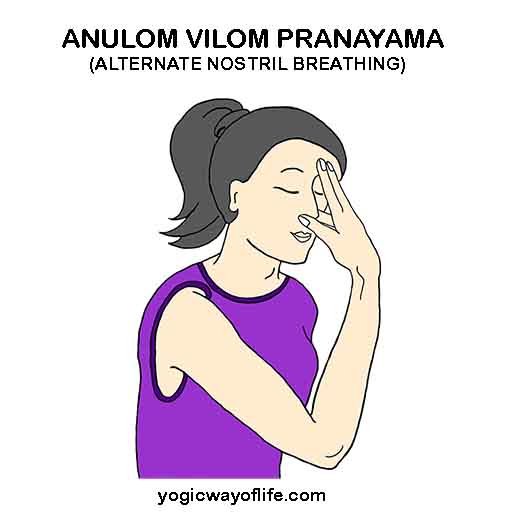
Anulom Vilom Pranayama (Alternate Nostril Breathing)
Anulom Vilom Pranayama also called alternate nostril breathing exercise, next in the “Pranayama for flowing skin’ series, is a simple breathing exercise–most commonly known to balance the Tridoshas (three doshas) in the body, namely Vata, Pitta and Kapha. Anulom Vilom breathing exercise is one of the main practices of Pranayama. It is probably the easiest and the most effective way to stay healthy, have a calm mind and naturally glowing skin.
How to do Anulom Vilom Pranayama?
- Sit in a steady asana preferably Padmasana, Siddhasana or Vajrasana, with your spine straight.
- Now close the right nostril with your thumb and draw in air from your left nostril. Do this as slowly as you can, till your lungs are full.
- Now release the thumb from your right nostril and close your left nostril with your ring finger and breathe out slowly through the right nostril.
- Next draw the air in from the right nostril and then release it through the left nostril (close the right nostril with the thumb). This makes one round of Anulom Vilom Pranayama.
- Initially start with 5 rounds and then increase it up to 20 rounds in one sitting.
- The duration of inhalation in the beginning can be 2 seconds and gradually it can go up to 12 seconds or even beyond.
NOTE: Beginners can have one sitting in the morning and one in the evening. For advanced practitioners, they can have up to four sittings – one in the morning, one at noon, one in the evening and one at midnight.
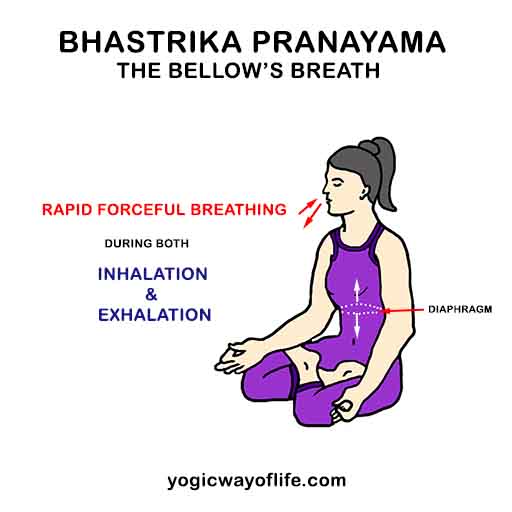
Bhastrika Pranayama (The Bellow’s Breath)
Bhastrika Pranayama also called the Bellow’s Breath is next in the ‘Pranayama for glowing skin’ series. In Sanskrit, Bhastrika means the ‘bellows’. Bhastrika involves both rapid inhalation and exhalation that helps to increase the circulation of blood in the entire body. During rapid and forced exhalation, the chest is compressed, pushing the blood towards the head. While in inhalation, the reverse takes place. This process increases the blood flow to every part of the body, increasing the vitality of all the organs and tissues. Long term practice of Bhastrika said to purify the body and awakens the inherent higher powers.
How to do Bhastrika Pranayama?
- Sit in a steady asana preferably Padmasana, Siddhasana or Vajrasana, with your spine straight.
- Keep your body erect with your mouth closed.
- Now you will inhale and exhale in rapid succession. While inhalation and exhalation process a hissing sound is produced.
- Initially start with 10 inhalations and exhalations per round. However, you can increase the number over a period of time.
- Advanced practitioners do Bhastrika along with Kumbhaka (holding of the breath) at the end of the last exhalation.
- To do Kumbhaka, take a deep breath after the last exhalation and hold the breath inside for as long as you are comfortable. Then exhale and start breathing normally. This will constitute one round.
NOTE: You can do three such rounds of Bhastrika. Make sure you rest for a while between the rounds, till the breathing comes back to normal. You can have two sittings, one in the morning and one in the evening.
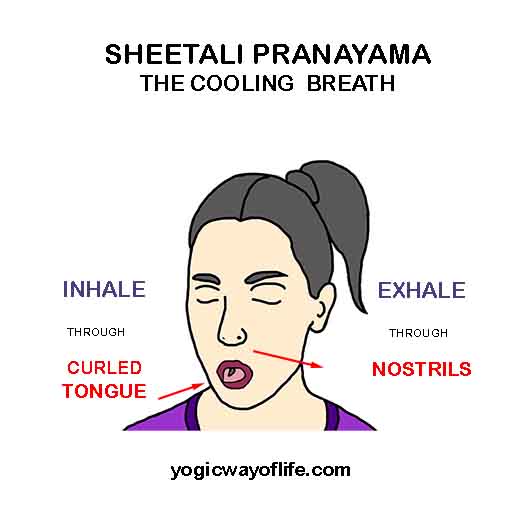
Sheetali Pranayama (The Cooling Breath)
Sheetali Pranayama also called the cooling breath is next in the ‘Pranayama for glowing skin’ series and is usually done after practicing other asanas and pranayamas. It creates a cooling effect on the body and relaxes the mind. Sheetali in Sanskrit means cooling, thus the name. It is mentioned in the yoga texts, such as Hatha Yoga Pradeepika and Gheranda Samhita.
How to do Sheetali Pranayama?
- Sit in a comfortable asana and place your palms on the knees.
- Now roll your tongue from the sides, forming a narrow tube of tongue. The tongue will be folded from both sides, with the edges almost meeting at the center on the top.
- Slowly inhale, first fill in the abdomen region, then the chest and finally the neck region. This is the complete yogic breath.
- Pull your tongue inside the mouth and close your mouth.
- Now bend your neck forward to do the chin lock, also called the Jalandhara Bandha
- Hold your breath for as much as you are comfortable.
- Now release Jalandhara Bandha and exhale slowly through the nose
- This is one round of Sheetali Pranayama. You can do as many rounds as you may feel comfortable.
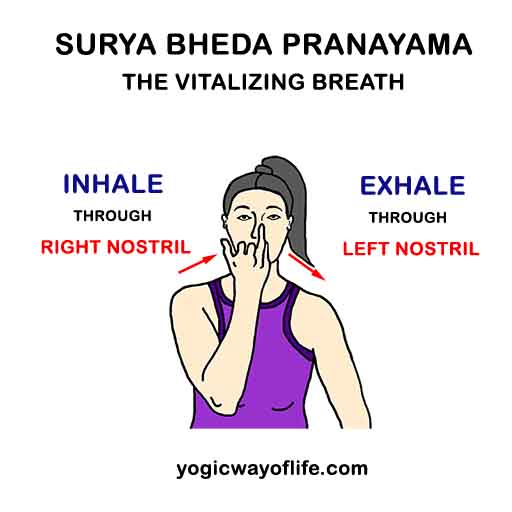
Surya Bheda Pranayama (The Vitalizing Breath)
Next in the Pranayama for glowing skin series is Surya Bheda Pranayama. Surya Bheda Pranayama also called The vitalizing breath, is one of the main pranayamas practiced with Kumbhaka. Surya in Sanskrit means the sun. In Surya Bheda Pranayama the Surya Nadi or the right nostril channel is activated. This Pranayama is also mentioned in the yoga texts, such as Hatha Yoga Pradeepika and the Gheranda Samhita.
How to do Surya Bheda Pranayama?
- Sit in a meditative asana, preferably Padmasana, Siddhasana or Vajrasana.
- Keep your trunk and spine straight and place your hands on the knees.
- Take few relaxed breaths before your start the practice.
- Now raise your right hand and place your forefinger and the middle finger on your forehead between the eyebrows.
- Now with your ring finger close your left nostril.
- Slowly inhale through your right nostril and fill in your lungs completely.
- Now close your right nostril with the thumb and the left nostril with your ring finger and hold the breath.
- Now perform Jalandhara Bandha (the chin lock) and Mula Bandha.
- Try to hold your breath as long as you are comfortable.
- Gradually release your Bandha, first Mula Bandha and then Jalandhara Bandha and exhale through your left nostril (Ida Nadi), while keeping your right nostril closed. This completes one round.
- Repeat as many rounds as comfortable. Initially you can start with 5 rounds and later increase it to 10 or beyond.
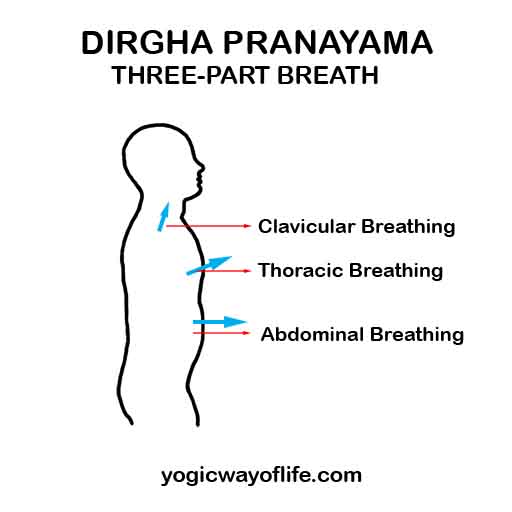
Dirgha Pranayama – The Three-Part Yogic Breathing
Dirgha Pranayama or the three-part breathing exercise is also known as yogic breathing or the full breath. It is the last practice in the ‘Pranayama for glowing skin’ series. Dirgha, in Sanskrit means long. Since, in Dirgha pranayama complete breathing is done with expansion of the abdomen, chest and the neck region, thus the name.
Method to do Dirgha Pranayama:
- Sit in any comfortable posture like Padmasana, Sukhasana, Vajrasana, or Swastikasana. If you want you can even sit on a chair, with your palms resting on thighs.
- Start with few normal breaths and relax completely. Now, move your awareness to every part of your body, from head to toe and relax each part one by one.
- Now, observe your breath. Just relax and keep observing your breath, without forcing the breath. Then, start the yogic breathing practice or Dirgha Pranayama as described below.
- Take a few slow deep breaths, fill in your belly first and observe the expansion of the abdomen. Continue inhaling.
- At some point of abdominal expansion, you will observe the chest expansion (or thoracic breathing) taking over and becoming prominent.
- After the chest expansion, the neck expansion (clavicular breathing) will take over and become prominent.
- In Dirgha Pranayama, one stage merges into the other. While performing Dirgha pranayama, you will observe that during all stages, every region expands to some extent or the other; yet only one region is prominently expanding in each stage. All this happens naturally, you don’t need to strain to do this. Because, any strain will disturb the natural breathing process. All you have to do is – be aware of the natural respiratory mechanism.
- Once the breath is full, start the process of exhalation. While exhaling, you will observe the reverse of inhalation process taking place. You will first expel the air from your neck region, then from your chest and finally from your abdominal region. (NOTE: When we say expelling from the abdomen, the air will actually be expelled from the lungs. The abdomen contracts only because of the upper movement of the diaphragm).
- This completes one round of Dirgha Pranayama. Try to do a few rounds of this slow and natural breathing. Make sure you observe every movement related to your breathing process. Practicing this way, you can get back your natural breath, something that you relished as a baby.
- You can practice this even during other light activities during the day. Even you can practice this in the lying down position or Shavasana or Corpse Pose.
To conclude….
It is said that if Pranayama is practiced regularly, it can even help in alleviating skin disorders such as psoriasis, eczema, and scleroderma. So, make sure you practice pranayama after every yoga session, it will help you have great skin.