Yoga can tone your arms and shoulders. Strong arms and shoulders are not just essential to get your arm balances right. They should also be strong enough to tone and strengthen your core. Wondering how? Toned, strong, flexible shoulders and arms allow you to focus on engaging the muscles of the core as you practice poses like Chaturanga Dandasana and Navasana. In the absence of these, you would have the tendency to round your shoulders and keep your arms inactive, which in turn would affect the way you practice a core posture. All these yoga postures for shoulders and arms work as core toners too.
7 Yoga Poses for Strong Arms and Shoulders
-
Gomukhasana – Cow Face Pose
The entire pose opens the hips and groins, elongates and tones the back and spine, opens the shoulders, stretches your arms, and strengthens the core.
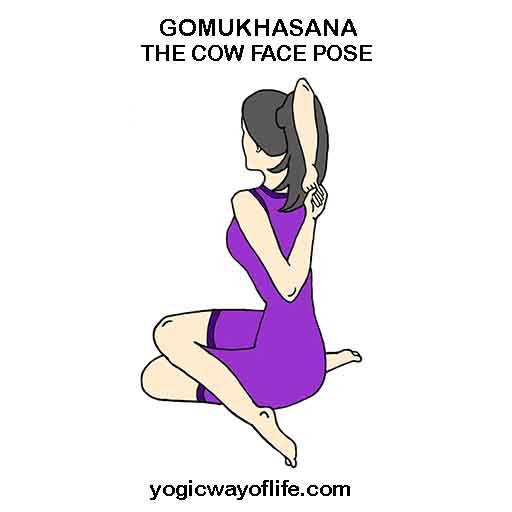
Sit down on the floor, spine straight, legs stretched out. Bend your left knee and allow the left heel to rest close to your right buttock. Bend your right leg and stack the right knee above the left one. Stretch your left arm sideways and rest it on your back, elbow facing the floor. Stretch your right arm over the head and fold it over the back, palms resting on your upper back.
Engaging your core muscles. Roll your shoulders back and try to clasp the fingers of both hands. Gently tilt your head back, close your eyes, and hold the posture for about 2 minutes. Breathe normally focusing on opening your heart and shoulders.
Unclasp your hands, straighten your legs, and repeat by stacking left knee over the right knee.
Tips: Do not sit in Dhyana Veerasana [knees stacked] if you have a ligament or meniscus injury. Choose to sit in Agnistambhasana or Fire log pose.
You can use a towel to hold your hands if you are not able to interlace your fingers.
To deepen the posture, inhale and lengthen your spine. Exhale and fold forward from your hips, rolling your shoulder back. Retain the position of your arms.
-
Brahmacharyasana – Celibate’s Pose
This asana strengthens your core muscles while stretching and toning your arms and legs. Since the muscles of your perineum contracts while practicing this posture, Mula Bandha happens naturally. Hence, it is beneficial for women. And, that could be the reason while women should avoid practicing the same during menstruation and pregnancy.
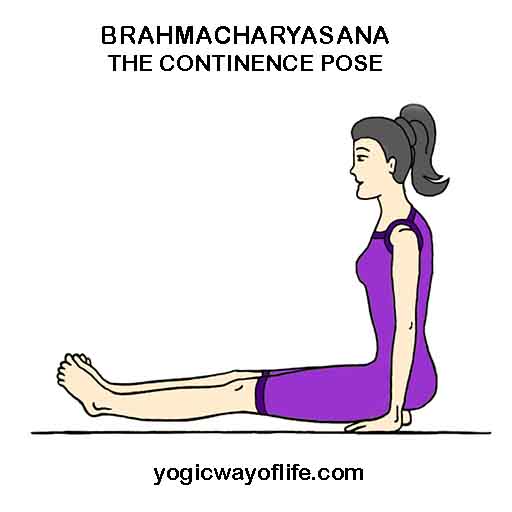
Stretch your legs out after completing Gomukhasana. Straighten your spine. Rest the palms on either side of your hips, fingers pointing forward and elbows perpendicular to the floor. Slide your palms slightly forward to adjust your center of gravity.
On an inhalation, engage your core muscles, press the palms into the floor and lift your feet, legs, and buttocks from the floor. Squeezing the muscles of your abdomen and maintaining active legs, balance on your arms. Breathe normally and hold the posture for seven deep breaths. If you feel your knees are bending, slightly round your shoulders, but aim to keep the legs straight and active.
Exhale and lower the body to the floor.
Gently recline on your back to get into Shavasana for a couple of breaths before moving into the next posture.
-
Kakasana – Crow Pose
It is also called as the Baka Dhyanasana or the Patient Crane Pose and is a nervine. The posture stretches and tones the shoulders and arms. It is beneficial for digestive issues and improves your coordination and balance.
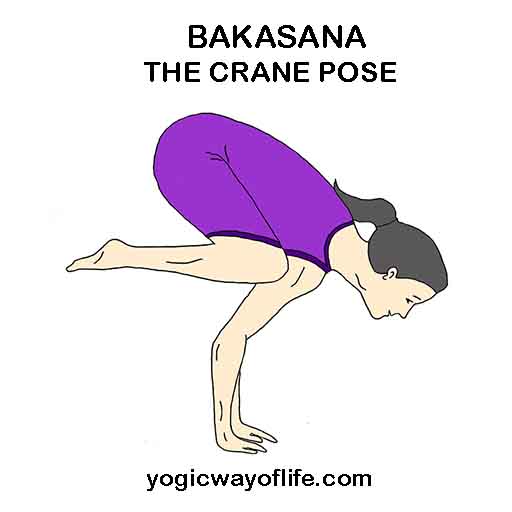
From Shavasana, roll to your right and squat with feet separated as wide as your hips. Place your palms in front of your feet, keeping the shoulder-distance apart. Press the palms into the floor, engage the core muscles, and balance on your toes. Inhale, bend your elbows backward, and lean against your biceps, shifting your entire body weight to the arms.
Exhale here. On the next inhale, lift your toes and heels from the floor and balance on the hands, knees resting on your upper arms. Gaze forward. Advanced practitioners can try gazing at their nose tips. Hold the posture, breathing deeply, for seven deep breaths.
Exhale and release the feet on the floor. Stretch out the legs and relax.
Tips: Avoid the posture if you have a meniscus tear, hypertension, heart disease, or cerebral thrombosis.
Lie down in Shavasana for seven breaths to relax and prepare for Chakrasana.
-
Urdhva Dhanurasana or Chakrasana – Wheel Pose
It strengthens the legs. Chakrasana is beneficial for your digestive, respiratory, nervous, and glandular systems. Since you are balancing on your arms, rolling your shoulder blades towards each other, it opens the shoulders and strengthens the arms. Please avoid practicing the posture if you have knee injuries, back issues, hypertension, wrist or shoulder injuries, or any other illness or during menstruation and pregnancy.
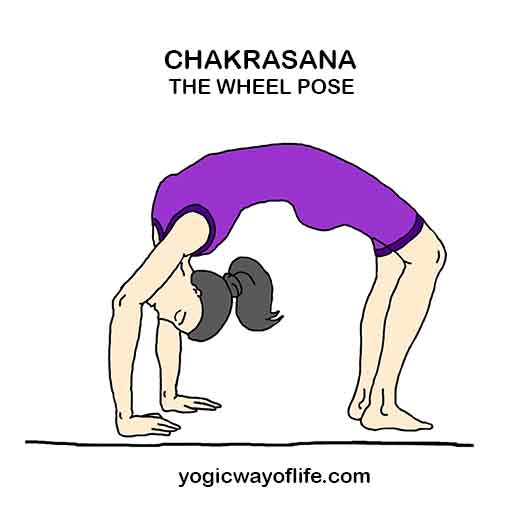
From Shavasana, bend your knees and bring the heels as close to the buttocks as possible. Separate your feet hip-width and allow your knees to fall inward slightly. Place your arms on the floor beside your head, fingertips pointing to the shoulders. Engage your core and relax your spine.
Inhale, press the palms and feet into the floor, and slowly lift your body and head from the floor. Breathe and lift the body as high as possible, squeezing your buttocks and engaging your arms and legs. Once you are stable, allow the crown of your head to move closer to the floor.
Breathing deeply, try to straighten your legs and hands. Arch your back as high as comfortable, allowing the head to hang in between your arms. Hold the posture for seven deep breaths.
Inhale and tuck your chin to the chest. Exhale and slowly lower your body in the following order – head, upper back, middle back, lower back, hips, and legs.
Stretch out your legs and lie on your back. Lift your head and chest from the floor and place the crown of the head on the floor to get into Matsyasana, or Fish Pose. Hold for five breaths. Come back to Shavasana by gently lifting the head from the floor and resting normally.
Tips: To deepen the posture, lift the heels while in the final position and hold for seven deep breaths.
It is a variation of the classic Plank pose where your forearms rest on the floor.
From Shavasana, roll to your right and lie down on your abdomen. Rest the palms on either side of your chest, elbows bending backward. Tuck your toes and push into Parvatasana. Take five deep breaths here to prepare for Dolphin Plank.

Place the forearms on the floor, palms flat on the floor, and come into Dolphin pose. From the Dolphin Pose, inhale and slide your body forward until the shoulders come directly over your elbows and your torso makes a parallel line with the mat. Roll your shoulders down and away from the spine and ears while pressing the forearms and elbows firmly on the mat.
Keep your tailbone parallel to the mat, but prevent it from sinking towards the mat. Engage the core muscles and lengthen the tailbone towards your heels as if someone is pulling the spine.
Keep your head and neck aligned with the spine. Gaze forward and hold the posture, keeping the face relaxed, breathing deeply, for seven breaths.
Exhale and lower into the floor.
Tips: Avoid the posture if you have shoulder or wrist injuries.
-
Pincha Mayurasana
– Bouncing Peacock
The posture is beneficial to boost metabolism and detoxify your digestive system. Also, it works towards strengthening your arms and core.
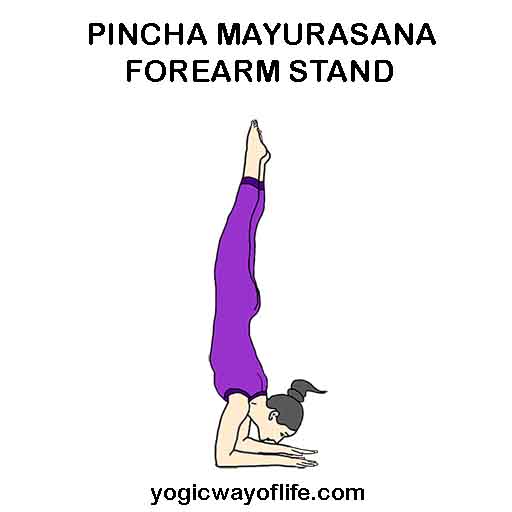
Come into Downward Facing Dog Pose. Stack your shoulders over your wrists. Bend your knees and walk forward to bring the knees close to your arms. Pressing your palms into the floor, lean on your lower arms, walk inward, slowly straighten your back, vertebra by vertebra.
Bounce one leg up while you continue straightening your back. Lift your pelvis and bounce your other leg. Join the feet and gaze at a point in front of you. Engaging abdominal muscles and thighs, hold the posture for seven deep breaths. Exhale and gently place the feet back on the floor and come back to Downward Facing Dog Pose.
Tips: If you are not able to balance on your arms, try this variation where you balance on your forearms. From Shavasana, place the forearms on the floor, palms flat on the floor, and come into Dolphin pose. From Dolphin Pose, pressing the palms firmly into the mat, walk your feet towards your elbows, and stack your hips above your shoulders. Lift one leg while you continue straightening your back. Lift the pelvis and finally the second leg. Join the feet and gaze at a point in front of you. Engaging abdominal muscles and thighs, hold the posture for 30 seconds. Exhale and gently place the feet back on the floor and come back to Dolphin Pose.
-
Mayurasana – Peacock Pose
It restores harmony and balance by cleansing and rejuvenating your entire body. Also, it is beneficial for a chiseled core. However, avoid the posture if you have any shoulder, wrist or core muscle injury. Women should avoid the pose while menstruating and pregnancy. Since the pose requires you to use abdominal muscles, do not practice the pose if you have digestive issues or hernia or duodenal ulcer.
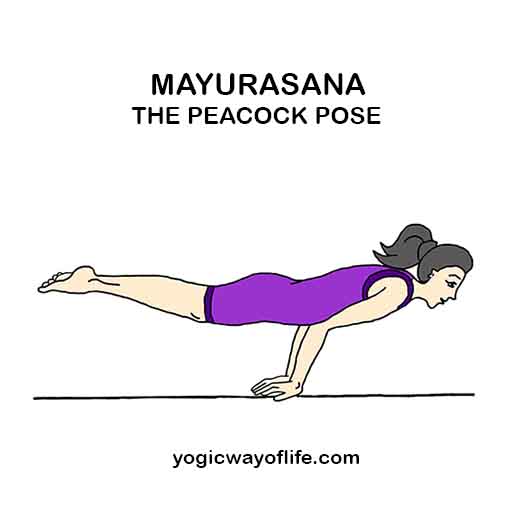
From Dolphin Pose, kneel on the floor, separating the feet as wide as your hips. Join the feet. Place both your palms in the space between your knees and lean forward. Let the fingertips point towards you. Join the elbows and forearms of both hands. Leaning forward, rest your abdomen against your elbows. Allow your chest to rest on your forearms.
Balancing on your arms, slowly straighten your legs, keeping them active and together. Stretch completely so that the toes point backward. Tensing the muscles of your entire body, gaze forward and fix your gaze at a point in front of you. In the final posture, you will be balancing your body on your arms with the support of your core muscles.
Hold the posture, breathing normally, for seven deep breaths.
Exhale and slowly release your legs and arms, and lie down on your abdomen.
Tips: Always practice this posture as the final asana of your practice as it stimulates intense detoxification process.
If you are comfortable with Padmasana, you could take up Padmasana legs in Mayurasana also called Padmamayurasana.
While all these poses are beneficial for shoulders and arms, listen to your body carefully before practicing any of these. Refrain from the practice or make necessary adjustments to ensure that you are healing, not hurting.
So are you ready to strengthen your shoulders, arms, and core? Get started right away!
THANK YOU VERY MUCH FOR SENDING THIS DOCUMENT.
With Warm Wishes
Arun Kumar.R
Despite some of those asanas are very difficult, almost impossible, I will keep trying in accordance to your instructions. Thank you very much!