Morning Yoga Poses for beginners is a series of yoga posture that one can easily do as a routine before getting to work.
More often than not, people avoid starting a daily routine because they think it will consume their lot of time. Which is not true, in fact having a morning routine can help people stay healthy and happy. Performing morning yoga poses help you start your day on a happy note. Incorporating morning yoga poses in your routine will only consume half an hour from your day. Spending half an hour daily for morning yoga and in return fetching maximum benefits is worth it!
Starting your day by connecting to your body and breath will help you create a positive and meaningful day. Yoga is one of the health disciplines that totally benefits mankind in every way. It is a science and art of balancing all the aspects of life, which includes your mind, body, spirit, and breath into one line, thereby making one’s life happier, calmer, harmonious and more fulfilling.
Importance of Morning Yoga Poses
Morning time is considered the most sacred time for practicing yoga. By incorporating morning yoga poses for beginners into your life you can bring phenomenal changes in your life. Waking up early in the morning, performing morning yoga poses in the fresh air helps create a sense of union, allows your body to control its sleep rhythms, and invigorate the functions of the organs, thereby ensuring a peaceful mind and healthy body.
Here is a list of morning yoga poses for beginners that you can incorporate into your daily routine and get maximum benefits:
1. Surya Namaskara
Begin your asana practice with Surya Namaskara, as it also warms up the body and prepares you for further asana practices.
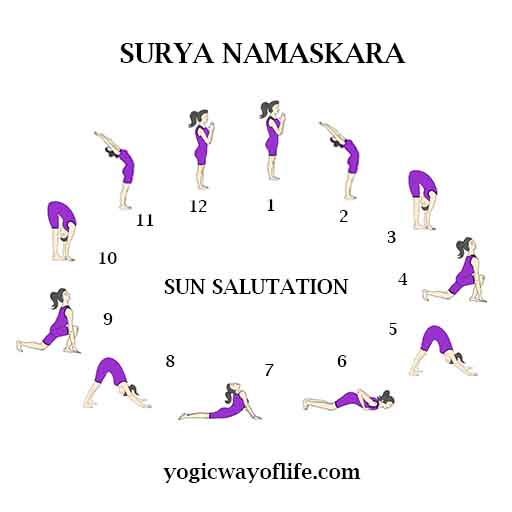
Surya Namaskara includes 12 steps sequence or rhythmic movements which are synced with the breath. Two such rounds make one cycle. It is one of the most popular and wide-spread asana sequences in Yoga. Undeniably, Surya Namaskara has myriads of benefits, as it is a complete body Vyayam or exercise. It not only benefits the body, but also increases the energy circulation in our body by releasing the stress, instilling peace and stillness, stimulating chakras, increasing awareness and so on so forth.
Repeat 1 – 5 rounds.
2. Mountain Pose or Tadasana
Surya Namaskara should be followed by Tadasana or Mountain Pose. It stretches and lengthens your muscles leading to the stimulation of the entire body.
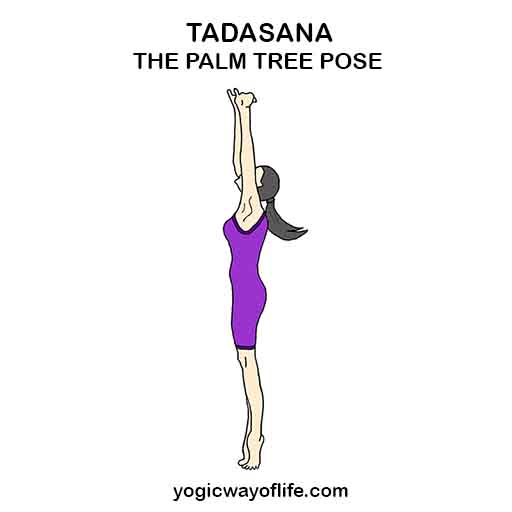
In Sanskrit, “Tada” means “Palm Tree”, and asana means “posture”. This pose is created by observing palm tree. Hence, it is called mountain pose. Here is how to perform Tadasana
- Stand straight on the ground with a small gap between your feet.
- Interlock your fingers
- Take a deep breath and with that raise both your arms.
- Stretch your arms upward let your fingers be interlocked.
- Raise your heels simultaneously stand on toes.
- Feel the pressure of stretching from top to bottom.
- Be in pose for few seconds keep breathing slowly and deeply.
- Now exhale and come to the original position.
- The number of rounds can be performed as per your convenience.
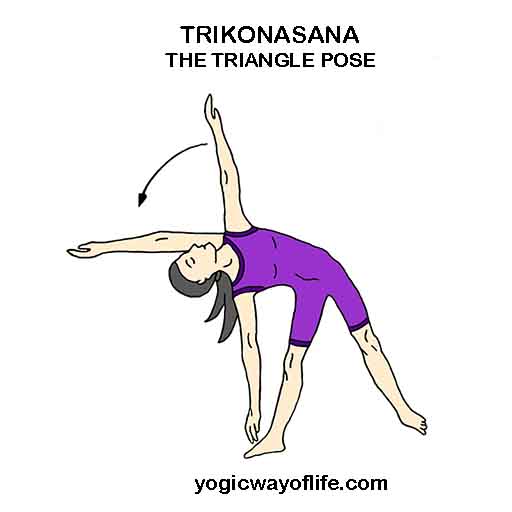
3. The Triangle Pose or Trikonasana
Trikonasana or the triangle pose is a good stretching exercise which gives flexibility to the spine and pelvic region. In Sanskrit ‘trikona’ means ‘three corners’ or a ‘triangle’. It helps develop strength and balance. Also, it gives flexibility to the legs, waist, and knees. Steps to perform Trikonasana:
- Stand erect with the feet about 3 feet apart with knees straight.
- Raise both the hands till they are in line with each other, parallel to the ground. Inhale when you are raising the hands.
- Now bend towards the right and slightly bend the knees, to touch the right foot with the hands. Look up at the left hand. Exhale when you are bending down to touch the foot. Keep the eye open throughout the practice.
- Return to the standing position.
- Repeat this with the left hand touching the left foot.
- This is one round.
- Practice as many rounds as is comfortable.
4. Cat-Cow Pose or Marjariasana/Bitilasana
Next post is Cat-cow pose or Marjariasana / Bitilasana, it provides a gentle massage to your spine. The gentle movement when coordinated with the breath stimulates the belly organs and calms the brain. Here are the steps to perform Cat Cow pose:
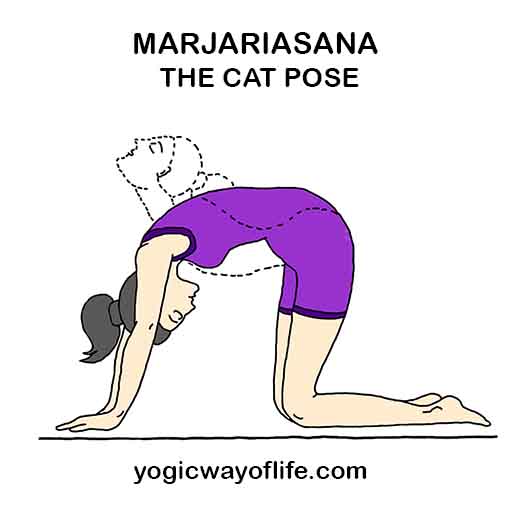
- Start on your hands and knees in a “tabletop” position.
- Your knees should be directly below your hips and your wrists, elbows and shoulders should be in line and perpendicular to the floor.
- Strongly press your palms into the ground and broaden your shoulders and keep the head in a neutral position.
- For Cow Pose: take a deep breath and drop the stomach towards the floor, while uplifting your chest and chin fix your gaze towards the ceiling.
- For cat pose: Breath out, arch your back towards the sky, pull your stomach to your spine, and touch your chest with chin.
Coordinate the movement sand flow from cat to cow and vice-versa with inhalation and exhalation.
5. Downward Facing Dog Pose or Adho Mukha Svanasana
Adho Mukha Svanasana or the downward facing dog pose stretches and straightens the spine. In Sanskrit, Adho means down, Mukha means face and Svana means a dog. It energizes and rejuvenates your entire body, including your mind. Here are the steps:
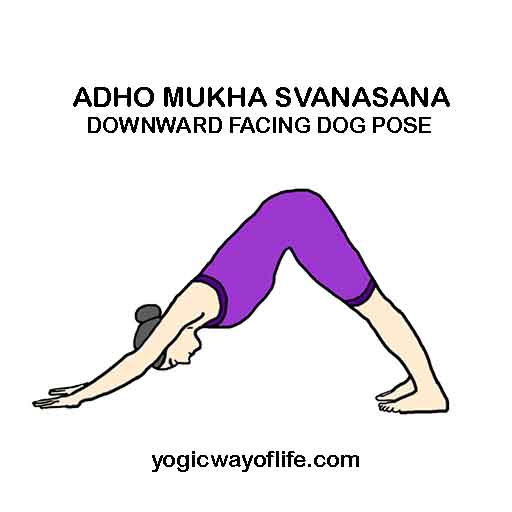
- Start with the kneeling position and place your palms on the floor in front of you.
- Let your palms be spread out on the mat. The knees should be preferably behind the tailbone to get a good stretch.
- Slowly raise your knees and straighten it out. Your legs will be straight and the weight of the body will be supported by your palms and feet.
- Now stretch your heels and the thigh muscles while straightening the legs.
- Tuck your belly in and push the chest slightly towards the floor while straightening the spine.
- Make sure the heels are touching the floor.
- Place your head between the inner-side of the upper arms and look down towards the floor. This is the final pose. Breathe normally in this position. Maintain the position for as long as you are comfortable.
- To release the pose, come back to the kneeling position and relax your back and arms.
6. Child Pose or Balasana
Balasana or the Child’s Pose is an excellent resting pose. In Sanskrit, Bala means Child and Asana means yoga pose. This asana or pose has been created by observing young children. This pose deeply calms your mind, lengthens the back body, hips and reduces fatigue. Here is how to perform:
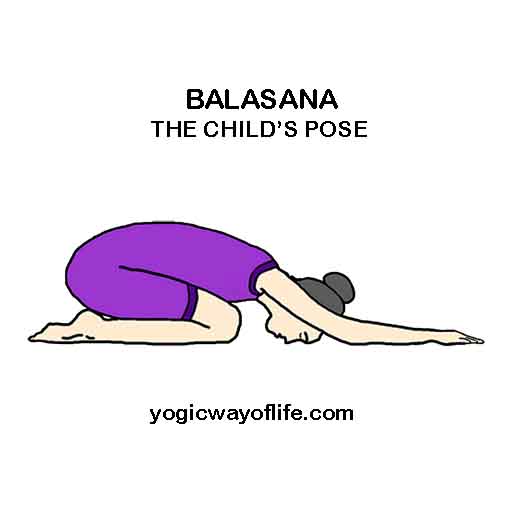
- Start with the kneeling position. Keep the feet and toes together.
- Now, spread your knees slightly apart. Inhale slowly and deeply.
- Slowly bend forward and let your chest rest between the thighs. Exhale as you are bending down. Let your hands be in front of you and resting on the floor, palms facing the mat.
- Adjust your pelvis and sacrum in such a way that your abdomen rests between the inner thighs and the back is stretched forward.
- The forehead should rest on the floor and palms facing downwards, fully touching the mat. The arms should be in line with the knees and fully stretched out and relaxed. If you have difficulty resting the forehead on the floor, you may use a pillow for support.
- Breathe normally in this position and feel the deep relaxation. Remain in this position for as long as you are comfortable.
- To release the pose, move your hands back and slowly raise yourself up to the kneeling position.
7. The Cobra Pose or Bhujangasana
Bhujangasana or the Cobra Pose, is one of the main backward bending asanas used in yoga. In Sanskrit, Bhujanga means ‘a cobra’. Bhujangasana is easy to perform and is also integrated into other yoga practices like the Surya Namaskara, it is the 8th pose in the series of 12 poses. Here are the steps:
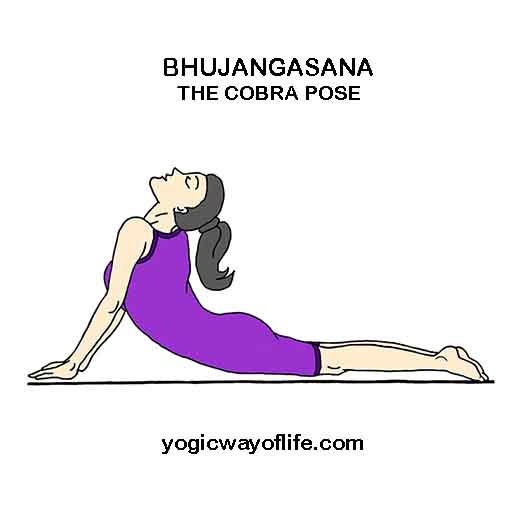
- Lie down on your belly with chin touching the ground.
- Place your hands close to the shoulders with palms touching the ground
- Keep your legs straight.
- Press your palms firmly against the floor.
- As you inhale, lift up your trunk, using your palms as support.
- Gaze towards the ceiling and let your hips be steady.
- Hold the pose for 15-30 seconds and then exhale and release the pose.
8. The Seated Forward Bend Pose or Paschimottanasana
Paschimottanasana or the seated forward bend pose gives your back muscles a complete stretch. In Sanskrit Paschima means west or back and Uttana means stretch or extended. It tones up organs of the abdomen like stomach, intestines, liver, kidneys and pancreas. It improves digestion and is good for diabetic patients. Here is how to perform this pose:

- Sit on the floor with legs stretched in front of you and place the hands on the thighs
- Now raise both hands above the shoulders and then bend forward as much as you can. Breathe out slowly while bending forward.
- Continue bending till your hands touches the legs. Grab the toes with your fingers and try to bend the head downwards till it touches the legs. *Do not go beyond your limits.
- Initially, you may not be able to touch the head to the legs that is all right. Go as far as you can. Do not strain.
- Remain in the final position for as long as you are comfortable. Breathe normally and slowly while maintaining this position.
- To release the position, raise the head and come back to normal sitting position with the legs stretched.
9. The Bow Pose or Dhanurasana
The bow pose or Dhanurasana is a backward bend pose. It strengthens the back and improves the flexibility of the spine. It is important to perform backward bend pose after performing Paschimottanasana. It is good to do any backward bending asana as a counter stretch.

- Lie flat on your stomach with your hands on the side.
- Keep your feet at hip-width distance and arms to the side of your body.
- Slowly bend your knees backwards as far as possible, almost touching the back of your buttocks.
- Now arch your head and neck upwards and backwards.
- Slowly move the hands towards the lower leg and try to get a hold of your lower leg at the ankles. Hold on to the ankles till you complete the asana.
- Now inhale deeply and expand your chest.
- When fully stretched, your shape will resemble a bow. Your thighs will be raised above the ground and you will be resting on the abdomen and the lower part of the chest.
- Continue in this position as much as you’re comfortable.
- Exhale and release the pose by letting go of the lower legs and bringing the legs, trunk and head to the original supine position.
10. Corpse Pose or Shavasana
Your morning routine should be concluded with Shavasana. In Sanskrit, Shava means Corpse. This Asana is created by observing corpse. Shavasana is the best asana to calm your mind, release any kind of stress in the body and sink in all the asanas at a deeper level. Here is how to perform Shavasana
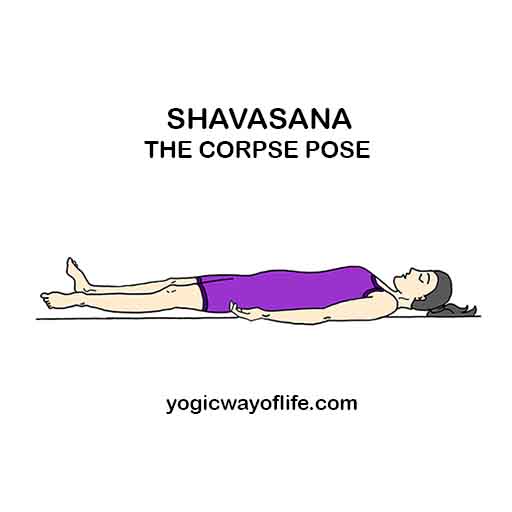
- Lie down on your back.
- Legs spread apart
- Place your arms beside your body facing upwards.
- Take deep breaths
- Stay in the pose for at least 10 minutes and then release the pose.
Benefits of Morning Yoga Poses for Beginners:
Incorporating Morning Yoga poses for Beginners:
- Brings clarity of mind
- Removes lethargy
- Improves your digestion
- Improves energy level that keeps you going for the whole day
- Last but not least, help you start your day with a happy note.
You all are an amazing group of people who dedicated their precious experiences about original yoga for beginners like me.